Tuesday 29 April 2014

'Creamy' Coconut Quinoa & Oat Porridge

Eating this porridge was like floating on a cloud, so dreamy. The coconut milk thickened and created this 'creamy' bowl of heaven. The cinnamon and nutmeg added a warmness, while the quinoa, oats, and almond/coconut butter added a nutty flavor profile, all together it was perfection.

I didn't add any sweetener, it really didn't need it. Cutting back on sugar has allowed me to savor and appreciate other flavor profiles. You'd be surprised the places your taste buds can fly!

Fiber filled and protein packed, this porridge bowl will leave you feeling satisfied, enlightened, and will get rid of your mid-morning stomach growling.

Feel free to top this dreamy bowl with more dreamy and superfood toppings like chia/flax seeds, granola (I topped mine with my coconut granola - still perfecting the recipe and then I'll share ;) ), and drizzle with some macadamia oil (or maple syrup if you really need sweetener).


'Creamy' Coconut Quinoa & Oat Porridge
Servings: 1

Ingredients:
1/4 cup of organic quinoa (I used sprouted)
1/4 cup gluten-free quick oats
1/4 cup of unsweetened organic shredded coconut
1 cup of homemade coconut milk (or store bought)
1/4 cup of water (you can add more later if it needs it)
1/2 tsp of organic ground cinnamon
Few dashes of nutmeg
1/8 tsp of Himalayan salt (or kosher/sea salt)
1 Tbsp of almond coconut butter (try making your own at home - I did, it came out fantastic!)
1 Tbsp of organic coconut oil
1/4 tsp of pure vanilla extract

Toppings:
- chia & flax seeds
- coconut granola
- macadamia oil

Directions:
In a small pot over the stove, combine all ingredients (except toppings), give a quick stir, and bring to a boil. Then lower the heat down to med/low and let simmer until it thickens and quinoa is fully cooked - about 5-10 minutes. Keep stirring occasionally.


Then pour into a bowl...


...and serve with your favorite toppings :)

Monday 28 April 2014

Warm Coconut Turmeric Milk

Everyone should incorporate turmeric, the "healing spice" into their lives. It is especially known for it's anti-inflammatory properties; ditch the Motrin, Aleve, and Advil, grab your container of ground organic turmeric instead.

Combined with other healing spices like cinnamon, cardamom, and ginger, this warming milk is an immune boosting, anti-inflammatory powerhouse.

Have a cold, headache, or upset digestion? Or just feel like cozy-ing up on the couch with something soothing? This is it.

The coconut milk adds a perfect sweet compliment to the warming tones of the other spices - you won't believe how unique and delicious this really is.


Warm Coconut Turmeric Milk

1 & 1/2 cups homemade coconut milk (or store bought)
1/4 tsp organic ground turmeric
a few dashes of organic ground cardamom
1/8 tsp organic ground cinnamon (or a cinnamon stick)
1 tsp fresh grated ginger

Warm all ingredients in a pot over the stove for 3-5 minutes to let all the flavors infuse.

Serve in a mug and let the healing begin :)

Sunday 27 April 2014

Breakfast Power Smoothie Bowl

Smoothie bowls are the ultimate power breakfast. You can pack your veggies, fruits, and superfoods all in one sitting AND have it taste amazing. The varieties are endless so you'll never get sick of them!

These bowls are packed with protein, mood boosters, skin glowers, metabolism speeder-uppers, and so many more benefiting vitamins and antioxidants you need in the morning to get your engine revving!

Here are some ideas that I've tried:


- Spinach
- Banana 
- Almond Milk
Topped with chia seeds, flax meal, hemp seeds, coconut granola, sunflower seeds, & almond butter


Same as above - Adding blueberries & flax oil


- Banana
- Almond Milk
- Frozen Blueberries
Perfect Fit Vanilla Protein
- Raw Almond & Cashew Yogurt (with probiotics!)
- Flax Oil
- Raw cacao powder
- Maca powder
Topped with chia seeds, flax seeds, coconut granola, macadamia oil (adds a bit of nutty-sweetness), almond butter


- Avocado
- Banana
- Spinach
- Flax oil
- Coconut milk
- Topped with flax meal, chia seeds, coconut granola, homemade almond coconut butter, and raw cacao powder

Saturday 26 April 2014

Berry Basil Fizz Mocktail

So refreshing. No other way to describe this drink, it's just what you need in your hand on a sunny day.


In a large pitcher, combine:
- fresh juice of 1 lemon
- 2 cups of frozen (thawed) or fresh berries
-  4-5 leaves of fresh basil

*Optional to add sweetener like honey or stevia. I didn't need any but I garnished my guests glasses with a honey & sugar rim for a hint of sweetness :)

Using a spoon, mash ingredients together to extract juices from the berries. Finish off with sparkling water.

Serve over ice & garnish with more berries & a sprig of basil.


"Creamy" Cauliflower & Carrot Soup

So flavorful, so creamy, so "mmmm,mmmmm, good!" - you will savor this soup until the last bite & might even be licking the bowl at the end.

No dairy thickeners needed here, the cauliflower adds that creamy texture, and it detoxifies your body at the same time, isn't that sweet?

Topping this soup with a dollop of raw nut yogurt (with probiotics) makes for a very happy & healthy belly. The tang and nutty profile it brings, completes this soup and notches it up from a 7 to a 10 in my book.

Let's add another 5 notches for the beautifully toasted homemade coconut bread on the side for dipping. What's soup without bread? Lame... that's what.


"Creamy" Cauliflower & Carrot Soup
Servings: 3-4

Ingredients:
1 Tbsp of organic coconut oil
2 Tbsp of organic shallots
1/2 package of organic baby carrots (because they're already peeled :) )
1/2 head of organic cauliflower - chopped & roasted (roasting the cauliflower with coconut oil adds a great nutty, smokey profile to this soup)
2 tsps of lemon zest
1 tsp of cumin
1/2 tsp of curry
2 cups of homemade chicken (or vegetable) stock
2 cups of water
Himalayan salt & fresh ground pepper

Raw almond & cashew yogurt for topping

Directions:
Heat the coconut oil in a medium/large pot over medium heat. Add the shallots (I used already prepared ones - if you use fresh - let them cook down for a few minutes). Then add the carrots, lemon zest, cumin, & curry and give a quick stir. Pour in the water & stock, bring to a boil, then reduce to low heat, cover & let simmer for about 15-20 minutes. Add your cauliflower & cover - let simmer for another 15-20 minutes, until veggies are nice & tender.


Then dump the soup mixture into a blender/food processor - season with salt & pepper to taste and blend until smooth & creamy.


Serve with a dollop of raw almond cashew yogurt, sprinkle with curry powder, & dip with a toasted slice of coconut bread


Raw Almond & Cashew Yogurt (with probiotics!)

I thought I'd find myself sighing and saying "it just isn't the same" - well, it was quite the opposite! I couldn't believe how good this was. It still had that tangy yogurt taste, creamy texture, and probiotic benefit. Plus, it had it's own unique nutty profile, I gotta say I'm diggin' it.

Your chain brand of plain yogurt has about 9g of sugar (let's not even talk about the flavored ones...) whereas this homemade brand has, yup, you guessed it, a big whopping ZERO grams.......just one reason why you should make your own homemade nut yogurt :)


Almond & Cashew Yogurt
Servings: one big jar

Ingredients:
1/2 cup of organic almonds
1/2 cup organic cashews
2 cups of water
1 probiotic capsule 

+ more water for soaking nuts
+ a wooden/plastic spoon (probiotics don't like metal)

Directions:
Place your almonds and cashews in a bowl and cover with water - let soak for at least 4-6 hours (I just leave mine overnight).
Strain the nuts and rinse well.
Place the nuts & the 2 cups of (clean) water into your high powered blender and blend on high until it develops into a smooth texture.
Place into a jar and use a wooden spoon to mix in the powder from inside your probiotic capsule. 
Cover with a clean towel and place it in a warm spot in the kitchen, away from direct sunlight. 
Now....just wait! Let it sit for about 24hrs, then taste it (remember - no metal!), if it's still not tangy enough, let it sit for a bit longer. 
Once it's up to par to your taste buds, cover it and store in the fridge.


Crunchy Seed Waffles with Almond Butter "Syrup"

The flavor profile of these waffles is out.of.control., there is a perfect balance between savory and sweet. The *secret ingredient* compliments so well with the vanilla and cinnamon launching your taste buds to a whole 'nother level.

The seeds give these waffles a perfect crunch with every bite but the inside still remains airy and fluffy, what more could you ask for in an ideal world?

Not only are these waffles delicious, they are gluten-free, dairy-free, & sugar-free. YUP, you better believe it!

To add to the plate, the nutrition level is also out.of.control, I think we hit every base with all the vitamins, minerals, and antioxidants your body needs. We have brain, immune, & digestion support, mood boosters, appetite control, anti-inflammatories, muscle builders, and the list goes on!

YES, you can eat with a purpose of healing your body and still have it taste amazing.


Crunchy Seed Waffles with Almond Butter "Syrup"
Servings: 4 square waffles

Waffles:

2 cups of a variety of seeds, nut/seed meals, gluten free grains/flours (feel free to make substitutions based on what you have around!)
I used:
1/4 cup of mixture of organic sprouted sunflower & pumpkin seeds
1/4 cup of organic unsweetened shredded coconut 
1/4 cup organic flax meal 
1/8 cup of organic hemp seeds
1/8 cup of organic chia seeds
1/2 cup of organic millet 
1/2 cup of organic buckwheat flour (or any gluten-free flour of choice)

1/2 tsp of organic vanilla powder (or 1 tsp of pure vanilla extract)
1 & 1/2 tsp of baking soda
1/2 tsp of Himalayan salt (or sea salt/kosher salt)
1 packet of organic stevia
1/4 tsp of organic ground cinnamon
*SECRET INGREDIENT* - A few dashes of organic ground cardamom

2 Tbsp of organic coconut oil (melted)
Almond milk - start with about 1 cup (It will depend what kind of seeds you used to how much liquid you need - after your first blend, you can begin to add more - you are looking for a pancake/waffle type batter consistency)

1/2 cup of organic chopped nuts - chopped (I used sprouted almonds)

Almond Butter "Syrup": Combine 2 Tbsp of raw organic almond butter with 1 Tbsp of organic macadamia oil

Directions:
Preheat your waffle iron.
Combine all ingredients (except chopped nuts) in a high powered blender (such as a VitaMix - you know I'm obsessed with mine!!) then blend. Add in slow increments of more milk from there, blending each time, until desired consistency is reached. Lastly, fold in your chopped nuts to the batter.
Once your waffle iron is heated, grease it with coconut oil then pour batter in, close the iron and let it do it's thang!
Cooking time will depend on your iron but you are of course looking for that golden brown crunchy exterior.
Once the waffle is cooked, remove it from the iron, put on a plate and drizzle with your almond butter syrup and sprinkle with more cinnamon.


I think you will REALLY enjoy these ;)


Monday 21 April 2014

No Empty Calories Here - Chia Bagels

It's been on my list to do some healthy bagel nutritimentation for awhile, well today was the day!

Bagels are often said to be "empty calories" and have "no nutritional value" - I beg to differ about my chia bagels. These are made with my best friend, spelt flour.

Why is spelt flour nutritional?

  • Spelt contains special carbohydrates called Mucopolysaccharides which possess anti-inflammatory properties. Anti-inflammatories are beneficial to your body inside and out, head to toe. Goodbye achey joints, headaches, and tummy pains.
  • Spelt is easily digestible but is still high in fiber. Fiber is essential to a healthy digestive system but can sometimes irritate it if your stomach isn't working at it's full capacity so spelt flour is a more gentle option and allows the absorption of the nutrients your body needs.
  • It also has a good amount of protein, thumbs up to that.
  • With the issue of everyone OD'ing on sugar spelt flour has the ideal combo of fiber, Vitamin E and magnesium, helping to control your blood sugar levels. Have one of these bagels in the morning and you won't be craving sugar an hour later!
  • High cholesterol? Get on the spelt train, it contains Niacin which can help lower your levels.
  • anddd it contains many more amino acids, vitamins, etc. I could go on all day! I love spelt!!
The chia seeds help add an even bigger nutritional bang - considered a superfood they have:

Five times the amount of calcium in milk (plus boron which helps you absorb it)
Three times the amount of antioxidants in blueberries
Three times the amount of iron in spinach
Three times the amount of fiber in oatmeal
Two times the amount of protein of any other bean, seed or grain
Two times the amount of potassium in a banana
.....In just two tablespoons! They also absorb water and swell up (which is how we make a chia egg for this recipe) which helps keep you full and satisfied longer.

These bagels are dairy free, (practically) gluten free, & yeast free - no bad bacteria growing in our stomachs here!


No Empty Calories Here - Chia Bagels 
Servings: 4 small bagels

Ingredients:
Dry
2 cups spelt flour
2 tsp flax meal (ground flax seeds)
1/2 tsp baking powder
about 1 Tbsp of arrowroot starch (*I was nervous they wouldn't stick together very well so I added a bit of this to help hold it together - you could add some more flax/chia seeds or omit & see what happens- yikes!)
1/2 tsp of salt
Wet
1/4 cup coconut oil
1/2 cup water
1 chia egg (1 tbsp chia seeds + 3 tbsp water - combine and let the chia seeds absorb water until they swell up and take on an egg like texture)

For poaching:
2 Tbsp of brown rice syrup (or molasses)
Large pot of water (full enough for the bagels to be completely submerged)
*This gives the bagels their glaze

Directions:

Preheat oven to 400 degrees. Also, place the pot of water with the rice syrup on the stove and let come to a boil.

Meanwhile, combine the dry ingredients and sift with a fork. Add the wet ingredients and fold together gently with your hands until everything is combined and dough forms.

Form your bagels by splitting the dough into four - then rolling it between your palms to shape a long cylinder. Take the two ends of the cylinder and press them together to form a bagel shape with the hole in the middle.

Once your water is boiling, give it a mix to dissolve all the syrup throughout. Then carefully place your bagels in to poach. They will sink at first but will start to float. Keep them moving so they don't stick! Once they start to float (about 3 minutes) - take them out of the water with a slotted spoon and place on a lined (or greased) baking sheet and place in the oven. Let them bake for 20 minutes - flipping half way through (10 minutes on each side.)

This is a base recipe you could get creative sprinkling with seeds, sugar or adding some cinnamon & raisins to the batter - the dough is your oyster, get that nutritimentation going :)


5 EASY Ways to Cut Down on Sugar!

Why cut back on sugar you ask?

Well here's what I've found the health benefits to be:
- you will feel more satisfied after you eat...ever finish eating a sweet treat or pancake breakfast and find you're still craving more?
- you will start to see a flatter stomach... fructose is converted to fat so less fructose = less fat!
- you will have more energy... no more sugar crash!
- you may find your digestive system isn't acting up so much....sugar can feed bad bacteria in your system (no bueno)
- you'll stop binge eating... sugar is addicting & sometimes you just can't stop

So that leads to reasons why you should monitor sugar intake...excess sugar can:
- be so addicting!! When is the last time you had only one bit of dessert or candy?
- rob your body of essential minerals
- stress you out!
- lower your immune system
- have negative effects on your pancreas
- fire up inflammation (this could cause the digestion problems)
- make you feel crappy & tired
- cause diseases like Diabetes (I've heard success stories of curing themselves of Diabetes once quitting processed sugar and unhealthy treats)
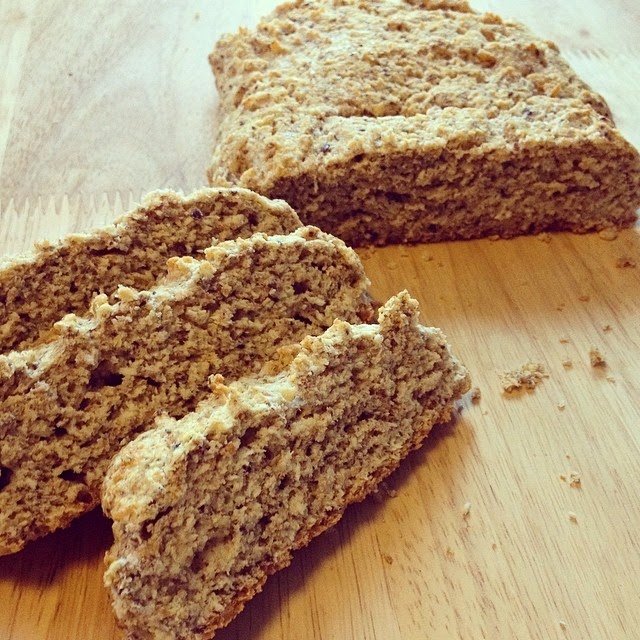

1. Use half a banana instead of a whole
Don't get me wrong, I love bananas, they are one of my favorite fruits! Great for smoothies, baking, and pancakes :) BUT it's been a wake up call to how much sugar they contain. One average size banana is about 15-20% sugar (12-15g of sugar per banana). You don't have to stop eating bananas because they have their benefits like potassium and calcium but if you're going to be eating other sugar containing products throughout the day, be conscious. Just use half in your smoothie or oatmeal instead of a whole one, cutting the sugar intake by half.

2. Monitor the dried fruit & fruit juices
Dried fruit concentrates the nutrients of the fruit but increases the sugar. Plus, it's very rare to find dried fruit without added sugar on top of the sugar already inside the fruit! The suggested amount of fruit to consume every day is about 2 cups but if you replace that with dried fruit you cut that in half to only 1 cup. A big part of eating is with the eyes, this can be deceiving to your brain thinking you're getting less and cause overeating and a BIG sugar overload.

As far as fruit juice goes, even freshly squeezed fruit juice such as apple, can contain the same amount of sugar as a glass of coke, about 10-12 tsps (SHOCKING - YES, I KNOW!). So, you have a few options, dilute half of your fruit juice with water or just drink water, herbal tea, or homemade nut milk instead!

3. Choose your fruits wisely!
If you know your sugar count is already high for the day or you plan on having some dessert after dinner, choose fruits with low sugar content like berries, grapefruit,  & pears. Fruits aren't the enemy, don't get me wrong, they have their benefits but are best to have in small portions. Try grabbing some celery or cucumber to snack on, they're both great detoxifying foods to help rid your body of toxins.

4. Swap your flavored yogurt for plain yogurt 
Flavored yogurts such as "fruit on the bottom" or "key lime pie" etc. can have anywhere from 12-30g of sugar! Take a moment to read the ingredient lists and nutrition facts before you grab one of these little sugar bombs because many also have a lot of those gibberish "natural" flavors. Instead, try grabbing plain yogurt (with no added sugar) and adding some cinnamon. You can add your own fruit is necessary but little hint, fruit is actually digested best when eaten alone.

5. Leave out the sweetener all together & add those healthy fats
Even some 'natural' sweeteners like honey, maple syrup, and agave can have high fructose content so try adding some warm spices like cinnamon & nutmeg or some naturally sweet tasting add-ons like homemade coconut/almond milk, coconut oil, almond butter or shredded coconut. Adding these healthy fats will also help curb sugar cravings. Plus, the less you sweeten, your taste buds will adjust and you won't always need that extra sweetness. You could also try out superfood powders like maca & lucuma which have a maple, butterscotch flavor that add a delicious touch to baked goods.


Note that all of this information is from personal experience and research. I highly recommend reads like I Quit Sugar by Sarah Wilson & Crazy Sexy Diet by Kris Carr

Wednesday 16 April 2014

Coconut Bread

This recipe is so simple and I was so surprised at how perfect this bread came out. The coconut components add a subtle sweetness and the spelt flour adds that nutty, earthy taste that bread has. It was so crisp on the outside and had the perfect moist, fluffy texture on the inside.

This coconut bread is also filled with health benefits containing essential vitamins & minerals to your bodies health, could it get any better?

Because it's only subtly sweet, it's versatile. Toast it for breakfast with some almond butter and toasted coconut (like I did :) ) or use it for lunch as your sandwich bread, or maybe even for dinner as a dipper into your coconut curry dish. The possibilities are endless!


Ingredients:

Dry
1/2 cup of coconut flour
1/2 cup of spelt flour*
1/2 tsp of Himalayan salt (I switched over to only Himalayan Salt, I suggest you do too!)
1 tsp of aluminum free baking powder
Dash of stevia

Wet
3 Tbsp of coconut milk
2 Tbsp of coconut oil
3 eggs*
2 flax eggs (2 flax eggs = 2 Tbsp of flax meal combined with 1/4 cup + 2 Tbsp of water: mix together and let sit until the flax absorbs the water and thickens to take on an egg like texture)

Directions:
Preheat oven to 350 degrees. Grease a small loaf pan with coconut oil. (I don't own a baking pan so I cut off a large piece of foil and folded up the sides to make my own!)

Combine dry ingredients and mix well. In a separate bowl, combine wet ingredients and mix well. Then fold the wet ingredients into the dry to make your bread dough. Once combined, place into your loaf pan and place in the oven for about 30 minutes or until it becomes firm to touch and golden on the outside.

Notes:
*This recipe is practically gluten-free as spelt flour can be tolerated by most people with gluten sensitivity as it's much easier digestible than wheat. You could replace spelt flour with a gluten free flour like Buckwheat. I personally LOVE spelt flour and the flavor notes it adds to this recipe....just saying :)
*To make completely dairy free you could replace the eggs with 3 more flax eggs. If the moisture level is low try adding some more coconut oil.


Sunday 13 April 2014

Vegan/Gluten-Free White Chocolate Brownies

Who doesn't love brownies? This white chocolate brownie is on a whole 'nother level. Compared to your typical brownie these are 100% guilt free. They are made with coconut flour & gluten free oat flour making them low carb, high protein, and high fiber - thumbs up to that. They also have wayyyyy less sugar and wayyyyy less fat (I used coconut oil & a coco-nut cashew butter which are filled with the healthy fats your body needs!).

Hope you enjoy :)

Fresh out of the oven - perfectly golden brown & gooey in the middle 


Finished product iced & topped with white chocolate nuts to pull it all together.


Vegan/Gluten-Free White Chocolate Brownies
Servings: 18 brownies

Ingredients: 

DRY
1.5 cups coconut flour
1/2 cup of gluten free oat flour (Place gluten free oats into blender or food processor and pulse until it becomes a flour like texture)
2 Tbsp of arrowroot starch
2 tsp of maca powder (optional for a superfood boost! Maca has a nutty- butterscotch flavor and adds a nice touch)
1/2 tsp baking powder
1/4 tsp baking soda
1/2 tsp of salt
3/4 cup of organic brown sugar (I used Sucanat - you could also use any light brown sugar)
A 2oz. package of Organic Living Superfoods White Chocolate Cashews, Almonds, & Cacao Nibs - crushed

WET
2 flax eggs (2 Tbsp of flax meal & 1/4 cup + 2 Tbsp of water - is equivalent to two eggs)
1/4 cup of coconut oil - melted
1/2 cup of You Fresh Naturals White Chocolate Cake Batter Coco-nut Butter
1/2 cup of almond milk
1 tsp of pure vanilla extract

Directions:

Preheat the oven to 350 degrees.

In a small cup, make your flax egg by combining the flax meal & water - let sit for a couple of minutes until the flax seeds absorb the water and create an egg-like texture.

In a large bowl, combine all the dry ingredients (except the crushed nuts) and mix well. In a separate small bowl, combine your wet ingredients (including your flax egg, it should be done by then) and mix well. Then add your wet ingredients to your dry and combine until your batter forms. Note: it's not going to be as runny as typical brownie batter - that's ok! If it seems a bit too dry, you can add a bit more coconut oil and/or coco-nut butter. Once combined, fold in your crushed nuts.

Place in a 8 or 9 inch baking pan (greased or lined with foil/parchment) and place in the oven for 30-35 minutes until golden brown on the top & edges.

Important!!! Let them cool in the pan before touching them or they will fall apart! Seriously....don't touch them!! :)

Once they are cooled, spread on some creamy cashew frosting & top with another package of white chocolate nuts and be ready to mind-blown!


Thursday 10 April 2014

Gluten Free Carrot & Zucchini Muffins

Sometimes it can be hard to try and fit veggies into your meals throughout the day so these are the perfect way to sneak them in anytime of the day and satisfy your sweet tooth at the same time. 

Muffins are personally one of my favorite breakfast items and these muffins were surprisingly delicious with warm notes from the cinnamon/nutmeg, a freshness from the orange zest, and a perfect, melt in your mouth texture.


Ingredients
Servings: 12 muffins

1 zucchini - grated
1 cup carrots - grated (hint: I placed the veggies in my vitamix and shredded them in there - a quick and easy shortcut!)
1 egg
1 small banana - mashed (or another egg - you could also use a full large banana and leave out the egg to make these dairy free - you might have to add a bit more oil)
1/4 cup coconut oil - melted
1/8 cup (2 Tbsp) almond milk

1/2 cup gluten free oat flour (just place oats into blender/food processor and pulse until it becomes a flour like texture)
1/2 cup of coconut flour
1/4 cup Sucanat (or any type of brown sugar)
1 tsp baking powder
1 tsp baking soda
1 tsp cinnamon
1 tsp arrowroot starch (since I used gluten free flours this helps keep it together)
1/4 tsp nutmeg
1/2 tsp salt
1/2 tsp of orange zest
1 Tbsp of flax meal

Directions:
Preheat oven to 350 degrees. Place baking cups into muffin tin or grease the tins with coconut oil.

Combine dry ingredients and mix well. In a separate bowl, combine wet ingredients and mix well. Then fold in wet ingredients into dry. Scoop batter evenly into muffin tin then place in the oven for 15-20 minutes.

Tuesday 8 April 2014

Protein Cinnamon Buns

Who doesn't love warm crunchy cinnamon buns drizzled with sweet icing?! Here's your guilt free, protein packed version.....you're welcome :)


Protein Cinnamon Buns

Protein crepe for the "dough":
1 packet of Tone It Up Perfect Fit protein powder (or 2 tbsp of whichever protein powder you have or flour)
2 egg whites 
1/2 tsp of cinnamon
Dash of salt
About 1.5-2 Tbsp of almond milk (to loosen up the batter)

Preheat oven to 375 degrees.

Combine ingredients in a small bowl and mix well (should be a thinner consistency than pancake batter). Pour into a heated/oiled non stick (10in.) pan over med-high heat & swirl around to spread thin and coat the entire pan. Cook until golden brown on each side (not too much or you won't be able to roll it!) Place aside, let cool a bit. 

Prepare your cinnamon roll filling:
2 Tbsp of organic Ghee - melted (or butter, or coconut oil)
1 tsp of cinnamon 

Spread your filling onto the center of your cooked crepe and roll it up! Then use a knife to cut into 1-2 inch slices to make your cinnamon buns. Place onto a cookie sheet and place in the oven for 5-10 min until crispy.

Meanwhile, make your icing. 
2 Tbsp of goat cheese 
1 Tbsp of organic pure maple syrup

Melt the goat cheese in the microwave for about 10 secs then mix with maple syrup until an icing type texture.

Once your cinnamon buns are nice and toasty out of the oven, drizzle your icing over them, and top with some more cinnamon and enjoy!


Sunday 6 April 2014

Homemade Spelt Flour Tortillas

The best way to ensure your food is fresh and not full of additives/chemicals is to make it at home!

These are a great alternative to store bought wheat tortillas, they have 5 simple ingredients compared to 10-12.
Ex:
Homemade Ingredient List: spelt flour, salt, baking powder, olive oil, water
Popular Brand Store Bought Ingredient List: Whole Wheat Flour, Enriched Flour (Bleached Wheat Flour, Malted Barley Flour, Niacin, Reduced Iron, Thiamine Mononitrate, Riboflavin and Folic Acid), Water, Soybean Oil, Salt, Sodium Bicarbonate, Mono & Diglycerides, Sodium Aluminum Phosphate, Sodium Aluminum Sulfate, Fumaric Acid, Potassium Sorbate, Corn Starch, Soy Flour, Sodium Propionate, Calcium Sulfate, Monocalcium Phosphate, Guar Gum, Cellulose Gum, Arabic Gum, Sorbic Acid, L-Cysteine.

See what I mean? What even is half that stuff!?

Plus, mine are filled with protein and essential vitamins, minerals from the spelt flour and are easily digestible.

I followed a recipe from here. (Also, listed below)


Homemade Spelt Flour Tortillas
Servings: 4

1 cup spelt flour
1/2 tsp salt
3/4 tsp of baking powder
1/2 Tbsp of olive oil 
1/3 cup + 1 Tbsp of water

In a bowl, mix all ingredients well. Cover and let sit in a warm place for 20 minutes. (I placed mine in a ziplock plastic bag)

Divide into 4 equal parts, roll into balls, and let sit, covered, another 20 minutes.

Flatten each balls with your hand then use a rolling pin to roll them out until they are paper thin. (Don't forget to coat your surface and rolling pin with flour so they don't stick!)

Preheat a skillet on medium high heat.

Place a tortilla into the skillet and watch until bubbles form, this doesn't take long.

After bubbles form, and the bottom is lightly brown (or there are darker spots), flip over, press down once or twice, and cook for about 30-45 seconds, or until lightly brown.

Cook remaining tortillas, watching carefully, and place in a plastic bag, with wet paper towels on top and bottom of stack to keep them soft and moist.

Refrigerate/freeze for later (they will last about 5-7 days in fridge or months in the freezer). You could make in bulk and double/triple this recipe. 


Digestion Detox Green Juice

This green juice is nature's medicine and works wonders on your digestive system. I have been having digestive issues and green juice has been my outlet to get the vitamins and minerals I need from veggies & fruits without the difficult to digest fibers. This one is filled with not only digestive, but whole body health benefits!


Cabbage - has Vitamin U, a powerful enzyme that heals stomach lining and corrects low stomach acid 
Celery - great anti inflammatory veggie! 
Cucumber - known for detox properties and helps rid the body of toxins 
Parsley - supports kidney function, also has anti inflammatory and detox properties 
Spinach - flushes toxins from the colon and protects lining of the stomach 
Pineapple - contains digestive enzymes to help digest food naturally

*I added a little bit of water to mine to bulk it up

Run all ingredients through your juicer and enjoy! 

I recently bought this Breville Compact juicer and am OBSESSED with it! It's a perfect size and doesn't take up much space, it's so easy to use, and most importantly even easier to clean! If you don't have a juicer but are thinking about getting one, this is one of the best investments I've ever made.


French Toast Pancake

Wait what1? Yup, this happened :) 


French Toast Pancake
Servings: 1

1 tbsp of gluten free oats 
2 egg whites 
1/2 banana - sliced 
1 tsp pure vanilla extract 
Dash of salt 
1 tbsp of grass fed organic ghee (ghee is clarified butter that stimulates acid production in your digestive system) 

Combine all ingredients (except ghee) and mix. Melt ghee in a small non stick pan over med heat. Add pancake batter and cook until golden brown on both sides.
Related Posts Plugin for WordPress, Blogger...